Task3 – Debugging with Serial Monitor
📝 Task 3
In TinkerCAD, use the Serial Monitor to display messages when the servo moves to each angle.
Brief
You’ve now seen how functions simplify your servo code - but when programs grow larger, it’s easy to lose track of what’s happening when.
That’s where Serial Monitor debugging comes in.
Using the Serial Monitor in Arduino IDE or TinkerCAD, you can print messages to the screen showing what your code is doing in real time. This is essential for troubleshooting and understanding your program’s flow.
Objectives
- Learn how to use the
Seriallibrary to display information - Understand when to use debug prints
Equipment
- TinkerCAD account
- x1 Arduino Uno (virtual)
- x1 Servo (9g or similar)
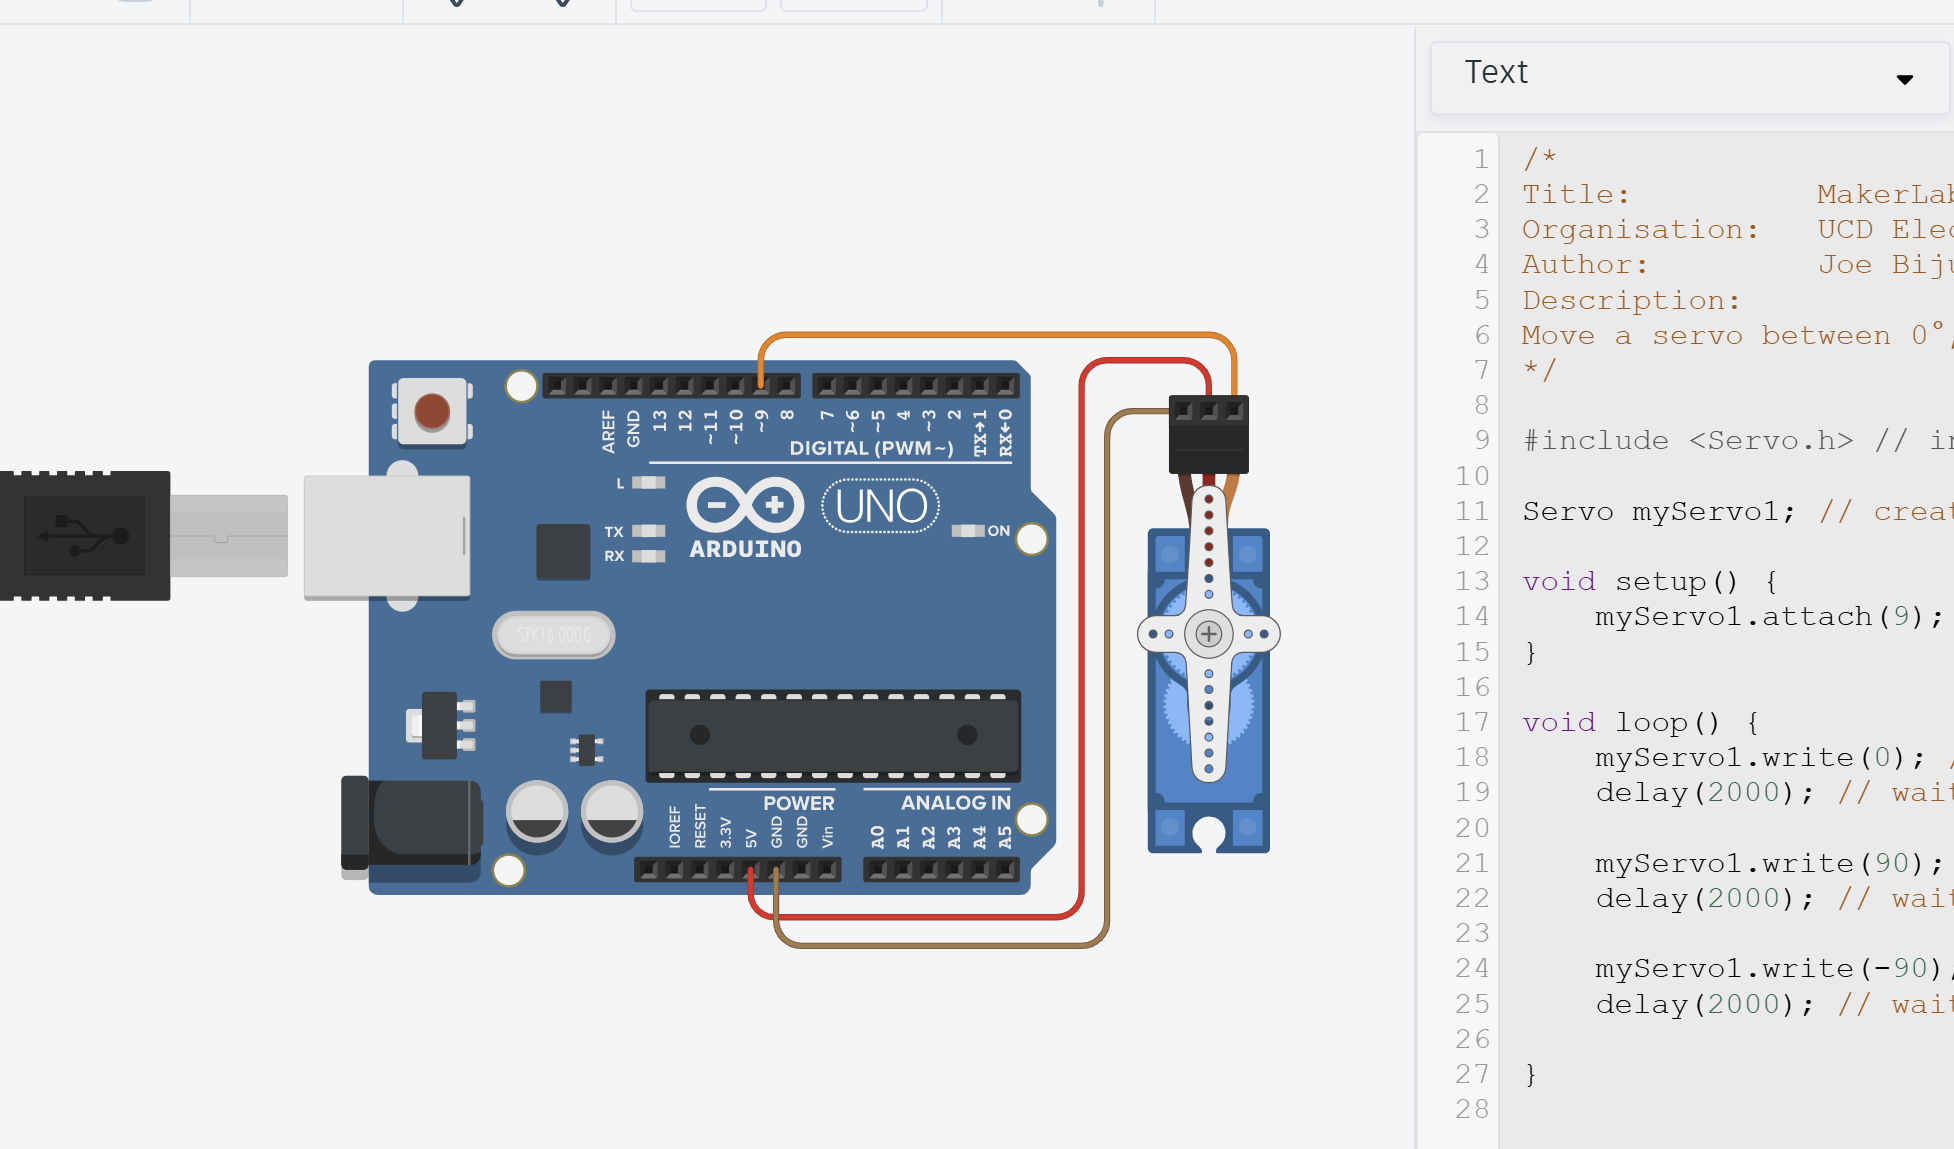
Step 1 – Continue from Previous Task
You can continue using the same TinkerCAD design and code from Task 2.
Step 2 – Programming Serial Communication
Setting up and using Serial library
The Serial library and function are built into Arduino, similar to how pinMode() etc. is.
The Serial library handles UART communications between devices. In our case, the Arduino and the PC.
The
Seriallibrary is automatically included for Arduino Uno just for communicating between Arduino and PC. There may be times you want to talk to other peripherals via the digital pins.In that case, you might use
Hardware SerialorSoftware Serialand create multiple ports. We will not cover it in labs.
Before using the Serial Monitor, we must initialise serial communication inside setup().
Insert the following line at the start of your setup():
Serial.begin(9600); // Start serial communication at 9600 baud
This tells the Arduino to open up a COM port with the PC/TinkerCAD and begin communicating at a baud rate of 9600.
There are many baud rates you can use. Commonly you will find online either 9600 or 115200. It just some standard speeds for transmitting information developed over the years. More standards were released as more powerful computers with higher clock cyles were built.
Higher speed just means faster communication. There are risks of more errors technically (though pretty much zero chance of errors when using USB of Arduino, more common in wireless Serial Monitors), however, most protocols have error correction. If you’re interested, read about the OSI Model and Physical Layer in communication systems (you will learn this if you take EEEN20060)
For hobby electroncics, feel free to use whatever you want. Just make sure the Arduino and PC both are set to the same baud rate!
Use Serial library functions
Then, you can use either Serial.print() or Serial.println().
Serial.print("Hello ");
Serial.print("World!\n");
Serial.print("I love MakerLabs :D");
Which will output the following
Hello World!
I love MakerLabs :D
Notice how .print() function prints on the same line as before. So to go to the next line, we add the \n character.
This gets tiring though, so we can use the .println() function that automatically inserts the \n character. So we can rewrite as
Serial.print("Hello ");
Serial.println("World!");
Serial.print("I love MakerLabs :D");
There are many other functions in Serial library, including those that read as well as write. See Arduino Docs for more info
Modify setServoAngle function
We’ll now modify the setServoAngle() function from Task 2 to include Serial output.
/*
    Function that takes in servo angle and delay and moves servo to target
*/
void setServoAngle(int targetAngle, int delayTime = 2000) {
    // Print the target angle to Serial Monitor
    Serial.print("Moving servo to angle: ");
    Serial.println(targetAngle);

    myServo1.write(targetAngle);
    delay(delayTime);

    return;
}
Full Code
/*
Title:          MakerLab2-Task3-Debugging
Organisation:   UCD ElecSoc – MakerLab
Author:         Joe Biju
Description:
Add Serial Monitor debugging messages to track servo movement.
*/

#include <Servo.h> // include the servo library

Servo myServo1; // create a servo object

void setServoAngle(int targetAngle, int delayTime = 2000) {
    // Print the target angle to Serial Monitor
    Serial.print("Moving servo to angle: ");
    Serial.println(targetAngle);

    myServo1.write(targetAngle);
    delay(delayTime);
}

void setup() {
    Serial.begin(9600); // Start serial communication
    myServo1.attach(9, 500, 2500);  //Link the servo signal to pin 9
    Serial.println("Setup complete. Beginning servo test...");
}

void loop() {
    setServoAngle(0);
    setServoAngle(90);
    setServoAngle(180, 5000);
}
Step 3 - Run
In TinkerCAD:
- Click “Code” on the top right to open the code panel if not already.
- Click “Serial Monitor” at the bottom right corner.
- Press Start Simulation.
You should have the same physical result as Task 1, only now you can open the Serial Monitor to view messages!
- Check that the baud rate in Serial Monitor matches
Serial.begin(9600).- If nothing prints, ensure
Serial.begin()is in yoursetup()and not inside a loop.- Avoid flooding the Serial Monitor with too many prints inside
loop()- it can lag the simulation.
Step 4 – Modify and Explore
Try adding more messages to help debug. Maybe print both the angle and delay values:
Serial.print("Angle: "); Serial.print(targetAngle);
Serial.print(" | Delay: "); Serial.println(delayTime);
You’ll quickly see how easy it becomes to track what’s happening in your code - especially as it grows in complexity.
If you don’t want to print a message, simply comment it out by insert // at the start of the line (or the shortcut CTRL + /)
The Serial Monitor is your best friend when things don’t work.
- Use it to check whether your code reaches certain lines.
- Print sensor values, timing information, or error flags.
- Delete or comment them out later once your program runs perfectly.
Every great engineer spends as much time verifying their code as writing it.
🚀 PRO-Tip!
Using
#define DEBUGfor Quick TogglesAnother super cool (but totatlly optional!) trick for switching Serial messages on and off without deleting them is to add this at the top of your sketch:
#define DEBUG if(true)
//#define DEBUG
Now, whenever you want a debug print, just write it like this:
DEBUG Serial.println("Hello world!");To quickly disable all debug output messages, simply comment out the first
#defineline and uncomment the second one - now nothing prints.//#define DEBUG if(true) #define DEBUGIt’s beyond the scope of the labs to explain how it works, but if you’re curious, ask a TA (Hint: Pre-processor directives).