Challenge0: Servo IRL
💪 Challenge 0
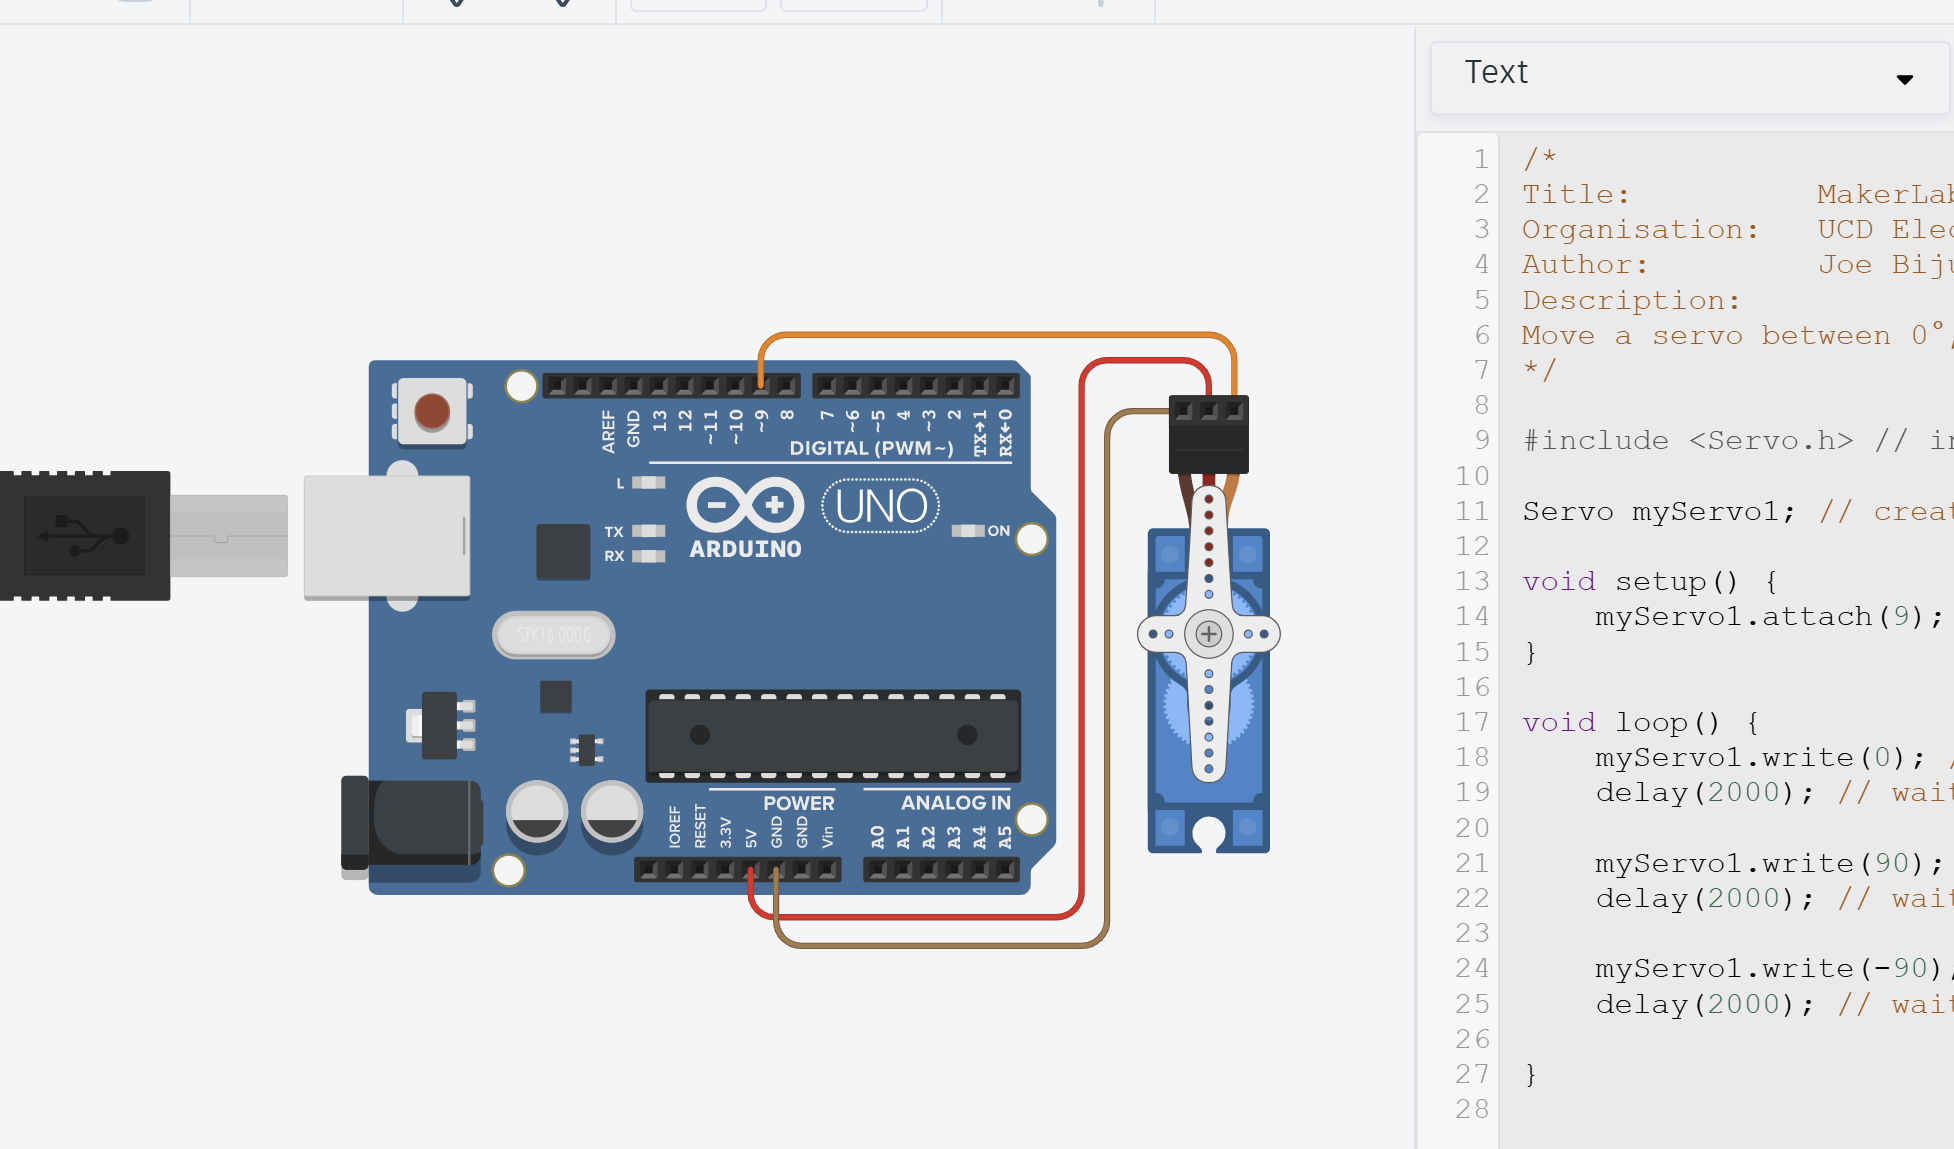
Build this simple circuit and program the Arduino with the code from Task 1
You’re first challenge! Challenges are unguided to test your abilities.
Don’t worry, you’re still allowed to use any resource to help you complete it including:
- Internet Resources
- Generative AI (make sure to understand it’s suggestions! TAs will quiz you 👀)
- Ask a TA (though do this after trying the above. Problem-solving is what makes you a good engineer!)
Objectives
- Using your code and designs from Task 1, build the circuit in real life!
- Once you’re done and it’s working, show a TA.
Equipment
- TinkerCAD account (with design from Task 1)
- x1 Arduino Uno
- x1 Servo (9g or any other)
- x3 Male-to-Male jumper wires
Useful Advice (Hopefully)
- Arduino IDE 2 is already installed on all the lab PCs (Note: there are two Ardunio IDEs installed on each PC. Use the newer version.)
- If you want to install Arduino IDE on your own PC, check out How to setup Arduino IDE.
- If you’re unsure how to upload a sketch to an Arduino (how to add libraries, how to select a COM port, etc.), check out How to upload a sketch to Uno.
- Make sure to use the tip from Task 0 and upload a simple blinking onboard LED first to check your Arduino works. To save you writing the code, go to
File > Examples > 01.Basics > Blink
By the way!
Make sure to try yourself, but of course, don’t spend the whole lab on this! If you can’t get it working in 3-5mins, please call a TA to help out. There’s so much more fun stuff to do, don’t get stuck on this step.
Media